

Welcome to the Kindergarten Hive Blog
Welcome to The Kindergarten Hive — where play sparks learning!
Dive into the world of playful learning with The Kindergarten Hive! This is a space where creativity and curiosity come together to make teaching (and learning!) joyful, meaningful, and affordable. Here, you’ll find digital resources and videos designed to help children explore, imagine, and grow — all through play.
Whether you’re a homeschool parent, classroom teacher, or bilingual educator teaching in French and English, you’re part of our buzzing community. Together, we celebrate the magic of learning through games, hands-on centres, and meaningful exploration.
Get ready for inspiration, connection, and ideas that make every day in the classroom a little more fun — because play isn’t just part of learning… it is learning. 🐝

Playing to Learn: How My Passion for Preschool Became a Resource for Other Teachers
As a kindergarten teacher in Quebec, I’m lucky to teach what we call preschool — the cycle that includes both four- and five-year-olds. What I love most about this age group is how naturally they learn through play. Children are curious by nature, and when learning happens in a playful, engaging environment, the possibilities are limitless.
In Quebec, play is taken seriously — so seriously that we are mandated to provide our students with two periods of unstructured free play each day, each lasting 45 to 60 minutes. And I couldn't agree more with that philosophy. Play is the foundation of creativity, problem-solving, and social-emotional growth.
Over time, I realized how much joy I found in creating playful learning experiences for my students. I love designing games and learning centres that blend exploration and academics. As a bilingual teacher who teaches both English and French, I faced a unique challenge: I wanted my activities to flow naturally between the two languages. I didn’t want two separate sets of materials or twice the prep — and I certainly didn’t want my classroom walls cluttered with duplicate versions of everything.
When I looked for bilingual resources, I quickly ran into a problem. Many materials I found online, especially on Teachers Pay Teachers, felt like poorly translated versions with awkward phrasing and spelling errors. They didn’t reflect the authentic bilingual experience I wanted for my classroom. So, I started creating my own games and centres — designed from the ground up to work seamlessly in either language.
Eventually, I realized other teachers might be looking for the same thing. That’s when I decided to share my creations on Teachers Pay Teachers. My resources provide flexible, thoughtfully designed activities that can be used in English, French, or both. Whether or not you teach bilingually, you can use them to make play-based learning simple, fun, and effective.
At the end of the day, my goal is to make learning through play accessible and meaningful — for teachers and for the little learners who remind us every day that play is learning.
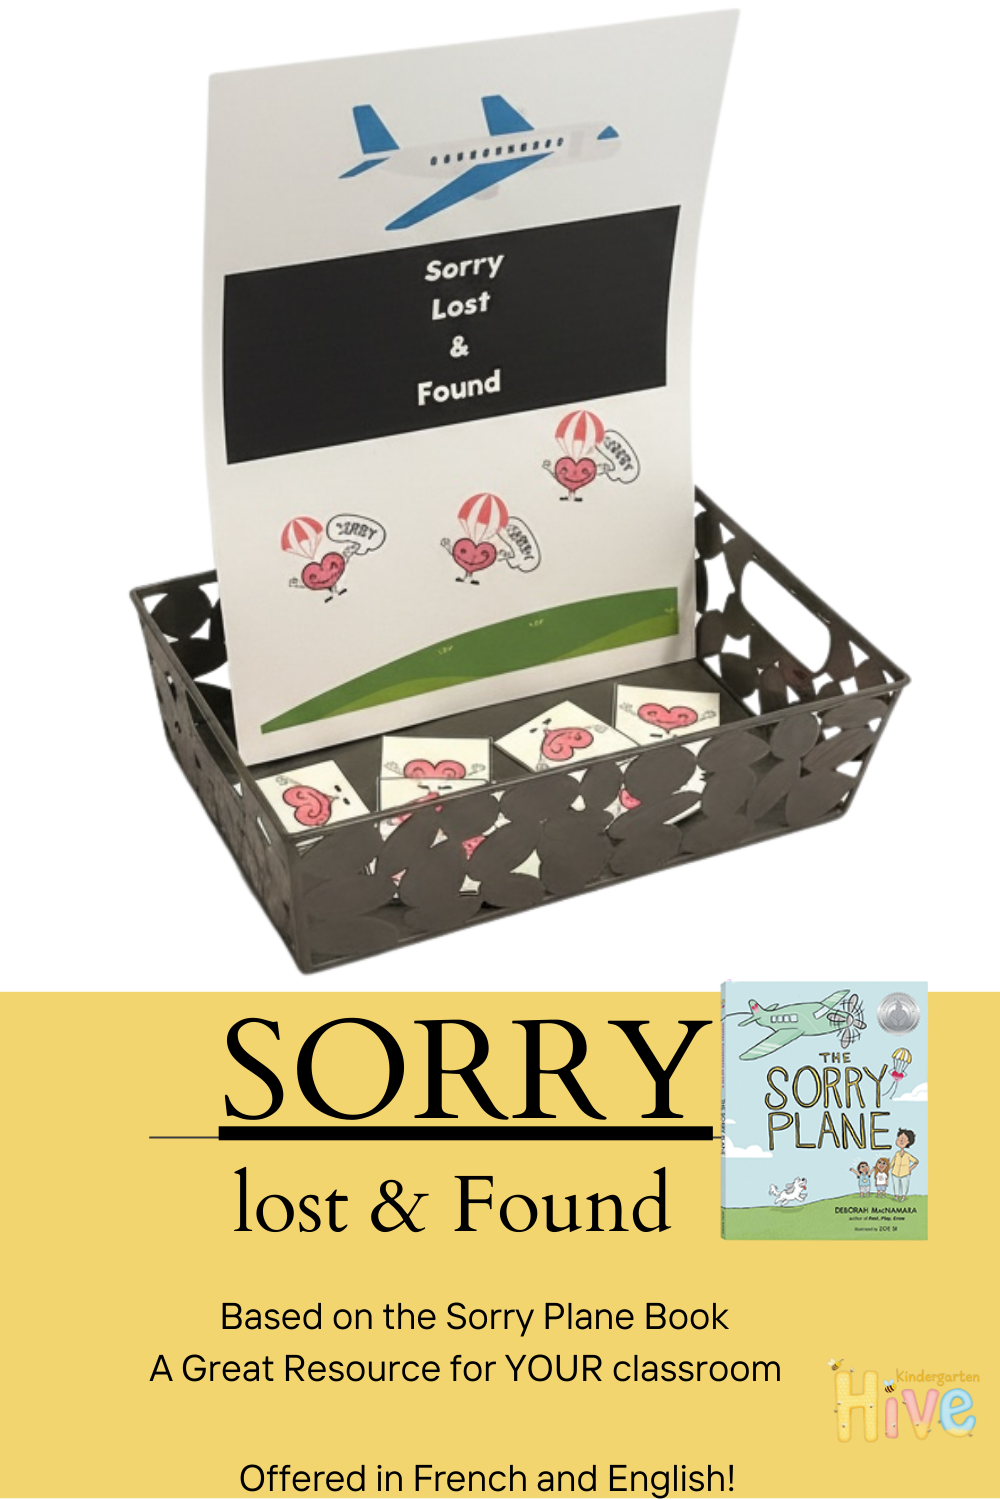
The Day Our Sorries Took Flight
One morning in my kindergarten class, I read a story called The Sorry Plane. It’s about two sisters, Molly and Lucy. When Molly accidentally breaks a balloon they’ve found, Lucy demands an apology. But Molly insists all her sorries are gone — they’ve slipped under the bed, gone down the drain, maybe even flown off to Paris on the Sorry Plane!
Their mother gently explains that we can’t truly say sorry if we don’t have any sorries left inside us. But when those sorries return — as Molly’s eventually do — then we can share them.
That idea really stayed with me. As teachers, we often hear quick apologies blurted out in frustration: “SORRY!” — sharp, automatic, hollow. I noticed my students were treating “sorry” like a ticket back to playtime. Hit, say sorry, move on. It had become a ritual, not a reflection.
So I started wondering: what if we didn’t force the sorry? What if saying sorry was something meaningful — something a child gave when they were ready? But then came the logistical question: how could I keep track of that with seventeen four-year-olds?
That’s when the “Sorries Lost and Found” was born. I made little cards — our sorries. When something happened, I’d offer a sorry card to the child who needed to give one. They could hold onto it until they truly felt ready to make amends. Sometimes it took minutes; other times, all day. But when they finally offered their card and said, “I’m sorry,” it was real. You could feel it.
Before long, something magical happened. The children began managing their own “sorries.” They’d quietly take a card for themselves after an incident or even retrieve one on behalf of a friend. They watched for each other’s feelings, not just their own.
Moments like that remind me that social-emotional learning starts from honest connection. It isn’t about perfect manners; it’s about empathy, repair, and grace — even at four years old.
If you want to bring this same spirit into your classroom, I created the Kindergarten Apology Lessons resource to help teachers teach the real meaning of “I’m sorry.” It’s perfect for fostering empathy, understanding feelings, and nurturing a compassionate classroom culture.
Ready to help your students find their sorries? ✨
This resource will help you make those moments matter. 💖

DIY Magnetic Fishing Game for Kindergarten – Learn Letters the Fun Way! 🎣
On a rainy afternoon, I was looking for a hands-on way to make letter recognition more exciting for my kiddos. I wanted something cheap, easy to make, and durable enough for little hands. That’s when the idea hooked me — a magnetic fishing alphabet game!
This DIY activity instantly became a favourite. Kids absolutely love “fishing” for letters — it turns literacy practice into a playful adventure. As they reel in their fish, they call out the letter name, sound, or even words that start with that letter.
What You’ll Need
-
🎣 Fish cutouts: You can use wooden shapes or foam ones (I grabbed mine from the craft section).
-
🧲 Small magnets: Attach one to each fish so the fishing poles can “catch” them.
-
🖌️ Chalk or acrylic paint: Let your creativity shine — bright colors make the fish extra fun!
-
🪵 Wax or varnish: Protects your artwork and makes the fish last longer.
-
👁️ Googly eyes (optional): Because everything’s cuter with eyes!
-
🔤 Vinyl Cricut letters or Dollar Tree sticker letters: Label each fish with a letter.
-
🪄 Fishing poles: I bought mine on Temu, but you can easily make one with a stick, string, and magnet.
-
💪 Super glue & patience: Keeps everything sturdy (especially important when your tiny fishermen get enthusiastic!).
How to Play
-
Scatter the fish face down in a “pond” (a blue towel, sensory bin, or even just the floor).
-
Have kids take turns fishing for a letter.
-
When they catch one, they identify the letter and sound — or use it in a word!
-
Mix it up by asking them to fish for specific sounds, spell simple words, or sort vowels and consonants.
It’s simple, engaging, and hits so many early literacy goals — recognition, phonics, turn-taking, and even fine motor skills. Plus, you can adapt it for French and English, making it perfect for bilingual classrooms like mine!
This little project reminds me why I love teaching through play — when learning feels like fun, everyone wins. 🌟
Watch the How to Make Video:
https://www.youtube.com/shorts/5wEi18cqKkE

Unlock Alphabet Mastery — The Bilingual Way! 🔑
It all started with a simple idea — I wanted my kiddos to see and hear language connections in both English and French. Learning letters is such a magical part of early childhood; it’s when children begin noticing sounds, patterns, and the shapes that make up words. But finding bilingual alphabet materials that actually made sense (and didn’t rely on odd translations) wasn’t easy.
So, I decided to create my own Alphabet Flash Card Template that pairs French and English images with the same initial sound. That means when my students see “A” for Avocat and Avocado, they’re reinforcing the same phonetic skill — just in two languages!
To make it even more fun, I turned our flash cards into a sensory sand tray activity. I poured some sand into a small wooden box I’d painted and personalized with Cricut vinyl letters (though any recycled container works too!). Kids pick a bilingual flash card, name the letter, and then trace it in the sand.
Every trace helps build fine motor coordination and letter recognition — and the best part? Any mistake is just a shake away from being erased! The kids love the feel of the sand, and I love how quickly they internalize both alphabets without even realizing they’re learning.
If you’d like to bring this playful bilingual approach to your classroom or home, you can grab my Alphabet Flash Card Template for free! 👇
👉 Get your free printable on Teachers Pay Teachers!
You can also watch the how to DIY an alphabet write in the sand, box here :